For the past 3 Octobers, I’ve been tagging along at Fender’s annual work conference in Las Vegas. The attendee list of 10s of thousands include clients, executives, engineers, computer programmers, developers, other engineers, other computer people, etc. As you can tell, I really don’t fit in. I’m introduced to Bill or Jim from the software division, and they starts talking about dongles, TCP, IP, GUI… To me it all sounds like a fuzzy episode of Star Wars/Star Trek. Am I the only one who feels useless when it comes to understanding computer jargon?
Since Fender is working quite a bit during the week, I normally spend most of my days alone in the casino or by the pool. I’m routinely asked “are you here for the conference” and it seems to be a lose-lose situation. If I say yes, I risk losing face by not knowing the difference between RAM and ROM. If I say that I’m not, I’ll be asked “How much for a good time?” (yes it’s happened more than once). I suppose during this conference, the “good time girls” are in high demand. I wonder if ComicCon has the same problem…
Anyway… I’m determined to contribute more to conversations at the conference this year. Therefore I’m slowly building my repertoire of “computer/internet” skills.
Skill 1 : The “dummies” and Adobe Photoshop-Free way to add a watermark to photos.
Yes, there is a free, less fancy version of Adobe Photoshop. Download here for free!
1. During the set up, I selected to have GIMP 2.8 launched as the default editing software for iPhoto.
2. In iPhoto, select your watermark/graphic and click edit. This file needs to be .png or .gif (not .jpg) to make the background transparent (trust me, I learned the hard way).
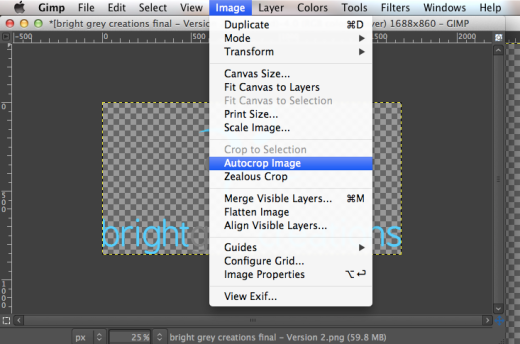
3. I’ve already done a few things – turned the background transparent (Add Alpha Channel) and cropped the image like so:
4. You then want to export your file
5. Save your watermark as a .gbr (just change the .png to .gbr) under brushes.
6. You can then go ahead to select the photo that requires a watermark. Click Edit.
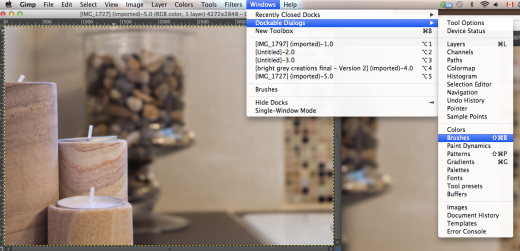
7. Open Windows > Dockable Dialogs > Brushes
8. Drag and drop your watermark onto your photo. (I shrunk mine and turned to grayscale)
9. Press M to move the positioning of your watermark (make sure you select the correct layer).
10. Final step is to Export again. This time you can save a .jpg! Bingo. If I can do it, anyone can.
I’m realizing that this is a bit extreme to keep Fender’s coworkers engaged in what I have to say. Maybe next time I could just say “Obama, eh…” and let the magic happen.


