The key to a healthy relationship is having a king size bed. Especially when both dogs sleep in the bed with us. I share my bed with a 7 lbs dog, a grumpy 65 lbs (post diet) dog and a 6’2” human furnace (really is, it’s ridiculous!).

- Spoiled? I think so.
So big bed = decreased floor space for a dresser. We needed a dresser that would be as tall as possible, but keeping within a max of 18” depth. After walking through the aisles of multiple big box stores without finding the perfect piece, I decided to create it!
I went to a local auction house and found a vintage solid oak dresser for under $150. Yeah!

- Found the perfect vintage dresser for under $150
Step 1. After removing the handles, sand the surface you’re looking to paint to allow primer to stick to the wood. My dresser didn’t have a heavy coat of varnish, so this step was pretty quick. I used a small hand sander for the large surfaces and fine grit sandpaper for the corners and areas around the hardware.
Step 2. Clean the surface with a soap and water to remove dust and sand debris. Allow to dry.
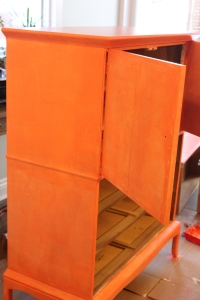
Step 3. Cover the edges you don’t want painted with tape. I framed the inside of the drawers and main unit to show the original wood in the drawers. You could also line the drawers with a patterned fabric to “pretty it up”. I decided to add a decal of a branch by creating a voided area (you’ll see later).
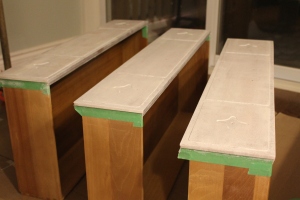
- I covered the edges with painters tape.
Step 4. Apply primer and allow to dry completely. You may need a second coat. In my case I put two coats on to make sure the wood din’t show through once I painted on the colour. I used the 1-2-3 Bulls Eye Zinsser Stain Killer primer. I recommend going with a water based primer instead of oil based – it cleans off with soap and water if you get it on your hands. Oil-based paints/primers require paint thinner and are not as eco-friendly.

- What I used
Step 5. While the primer dried, I spray painted the handles with oiled-rubbed bronze (to give my dresser an antique feel). It didn’t take very long to dry. After 20 minutes, I put a second coat on.
- Make sure you spray paint outside!

- will need a 2nd coat
Step 5. Paint on your first coat of colour. Took me a bit of time to convince Mr. Skeptic (Fender) to go with a beautiful coral (not pink) colour called Celebration. Our bedroom is heavy on the cool colours (white, grey and blueish grey), so a punch of warmth is just what it needed.
- first coat of paint (will lighten once it dries)
Step 6. Allow at the first coat to dry completely before adding a second. Mine took about 8 hours.
- painters tape applied to create my branch decal (to be removed after)
Step 7. Remove tape and add hardware. For under $200, including paint supplies I achieved this look!

- Perfect piece in our bedroom!
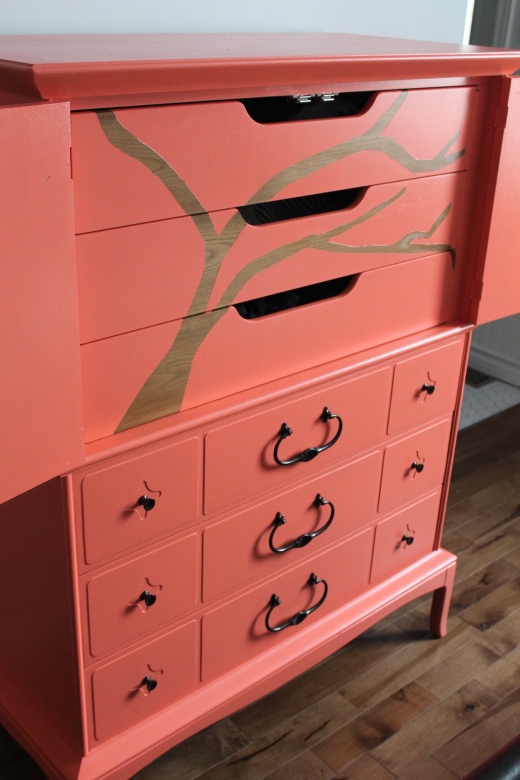
- Decal on the inside
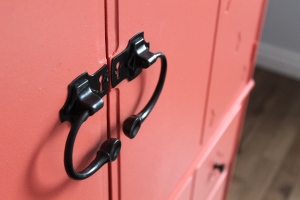
- Such a simple way to spruce up ugly hardware!
Hope you enjoyed my DIY furniture painting tutorial. Feel free to share your ideas and projects with me!